Email campaigns
Summary
In this article, you will learn how to send different types of email campaigns using the Growmatik Email Campaigns page.
- Creating a new email campaign
- Stop sending an email campaign
- Preview, duplicate, or remove a campaign
Creating a new email campaign
To create a new email campaign, follow these steps:
1. Click on the Email Campaigns page from the left sidebar of your Growmatik dashboard.
2. On this page, you’ll find a list of pre-designed email templates to choose from that best fit your campaign. Alternatively, click on the + New Campaign button located at the top right of the page to create your campaign through guided steps.
3. Choose your desired template and click on the Use This Template button. You’ll be redirected to the email builder page. You can also opt to create your own template by clicking on the Start From Scratch button. If you choose Start From Scratch, you will have the option to create email using HTML editor as well as drag and drop editor.
✍️ Note
There’s a filter column available on the left side of the page where all templates are shown. You can filter templates based on their occasion or topic.
4. Customize the template to your needs and click on the Save And Continue button.
✍️ Note
Read this article to learn more about creating email content with drag and drop editor.
5. Choose your recipients using one of the available options and click Continue.
6. Set your campaign settings by adding a proper subject line, sender email and reply-to email addresses. Click on the Continue button.
✍️ Note
Using personalize button you can add dynamic keywords to make your subject lines more personalized.
✍️ Note
You can also get writing assistance from Growmatik AI by clicking on the Write with AI button. AI writing assistance can help you with grammar and spell-checking, improve writing and more.
7. Now your email is almost ready to be sent. Review your email settings at this step and confirm it. You can also send a test email by clicking on Send Test Email.
8. Select Send and Schedule, then choose to send your email campaign immediately or schedule it for later.
10. After scheduling your campaign, you can click on the View Campaign button to see the list of created campaigns on the Email Campaigns page.
Stop sending an email campaign
If you need to stop sending a scheduled email campaign, follow these steps:
1. Navigate to the Email Campaign page.
2. Find the campaign you want to stop and click on the three-dotted icon next to it.
3. Choose Stop Sending option from the list.
4. Your email campaign will turn into a draft and you can reschedule it later.
Preview, duplicate, or remove a campaign
On the Email Campaigns page, you have the options to preview, duplicate, or remove your existing email campaigns. To perform any of these actions, follow these steps:
1. Go to the Email Campaigns page.
2. Choose the email campaign you want to modify.
3. Click on the three-dotted icon next to the email campaign to open the list of functions.
4. Click on each function you want to apply and confirm it.
Reports
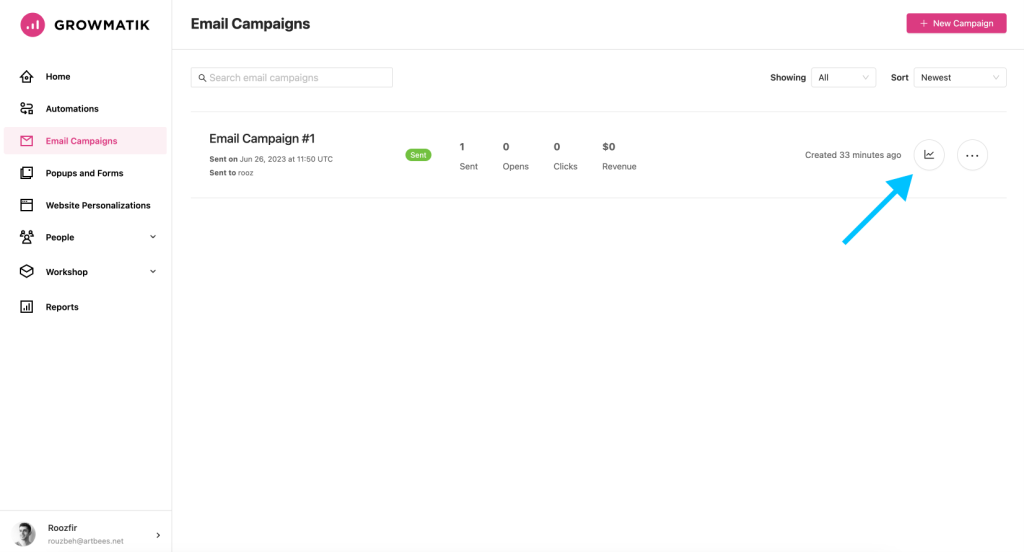
To view the analytics and performance data associated with an email campaign, click on the report button next to the options menu.

On the reports page, you can find the following useful information associated with an email campaign:
Sent: This metric represents the total number of emails successfully delivered to the recipients’ inboxes, indicating the reach and distribution of the campaign.
Click rate: The click rate measures the percentage of recipients who clicked on links or call-to-action buttons within the email, showcasing the level of engagement and effectiveness of the campaign in driving desired actions.
Open rate: The open rate reflects the percentage of recipients who opened the email, providing an indication of the campaign’s ability to capture attention and generate initial interest.
Revenue: The revenue metric quantifies the amount of income generated as a direct result of the email campaign, indicating the impact of the campaign on sales or conversions.
Unsubscribe rate: The unsubscribe rate measures the percentage of recipients who chose to unsubscribe from future email communications after receiving the campaign. It helps evaluate the relevance and quality of the content and allows for potential improvements in future campaigns.
Spam rate: The spam rate indicates the percentage of emails that were flagged as spam by the recipients’ email service providers. Monitoring and minimizing the spam rate is crucial to maintain a positive sender reputation and ensure deliverability to the recipients’ primary inbox.
